

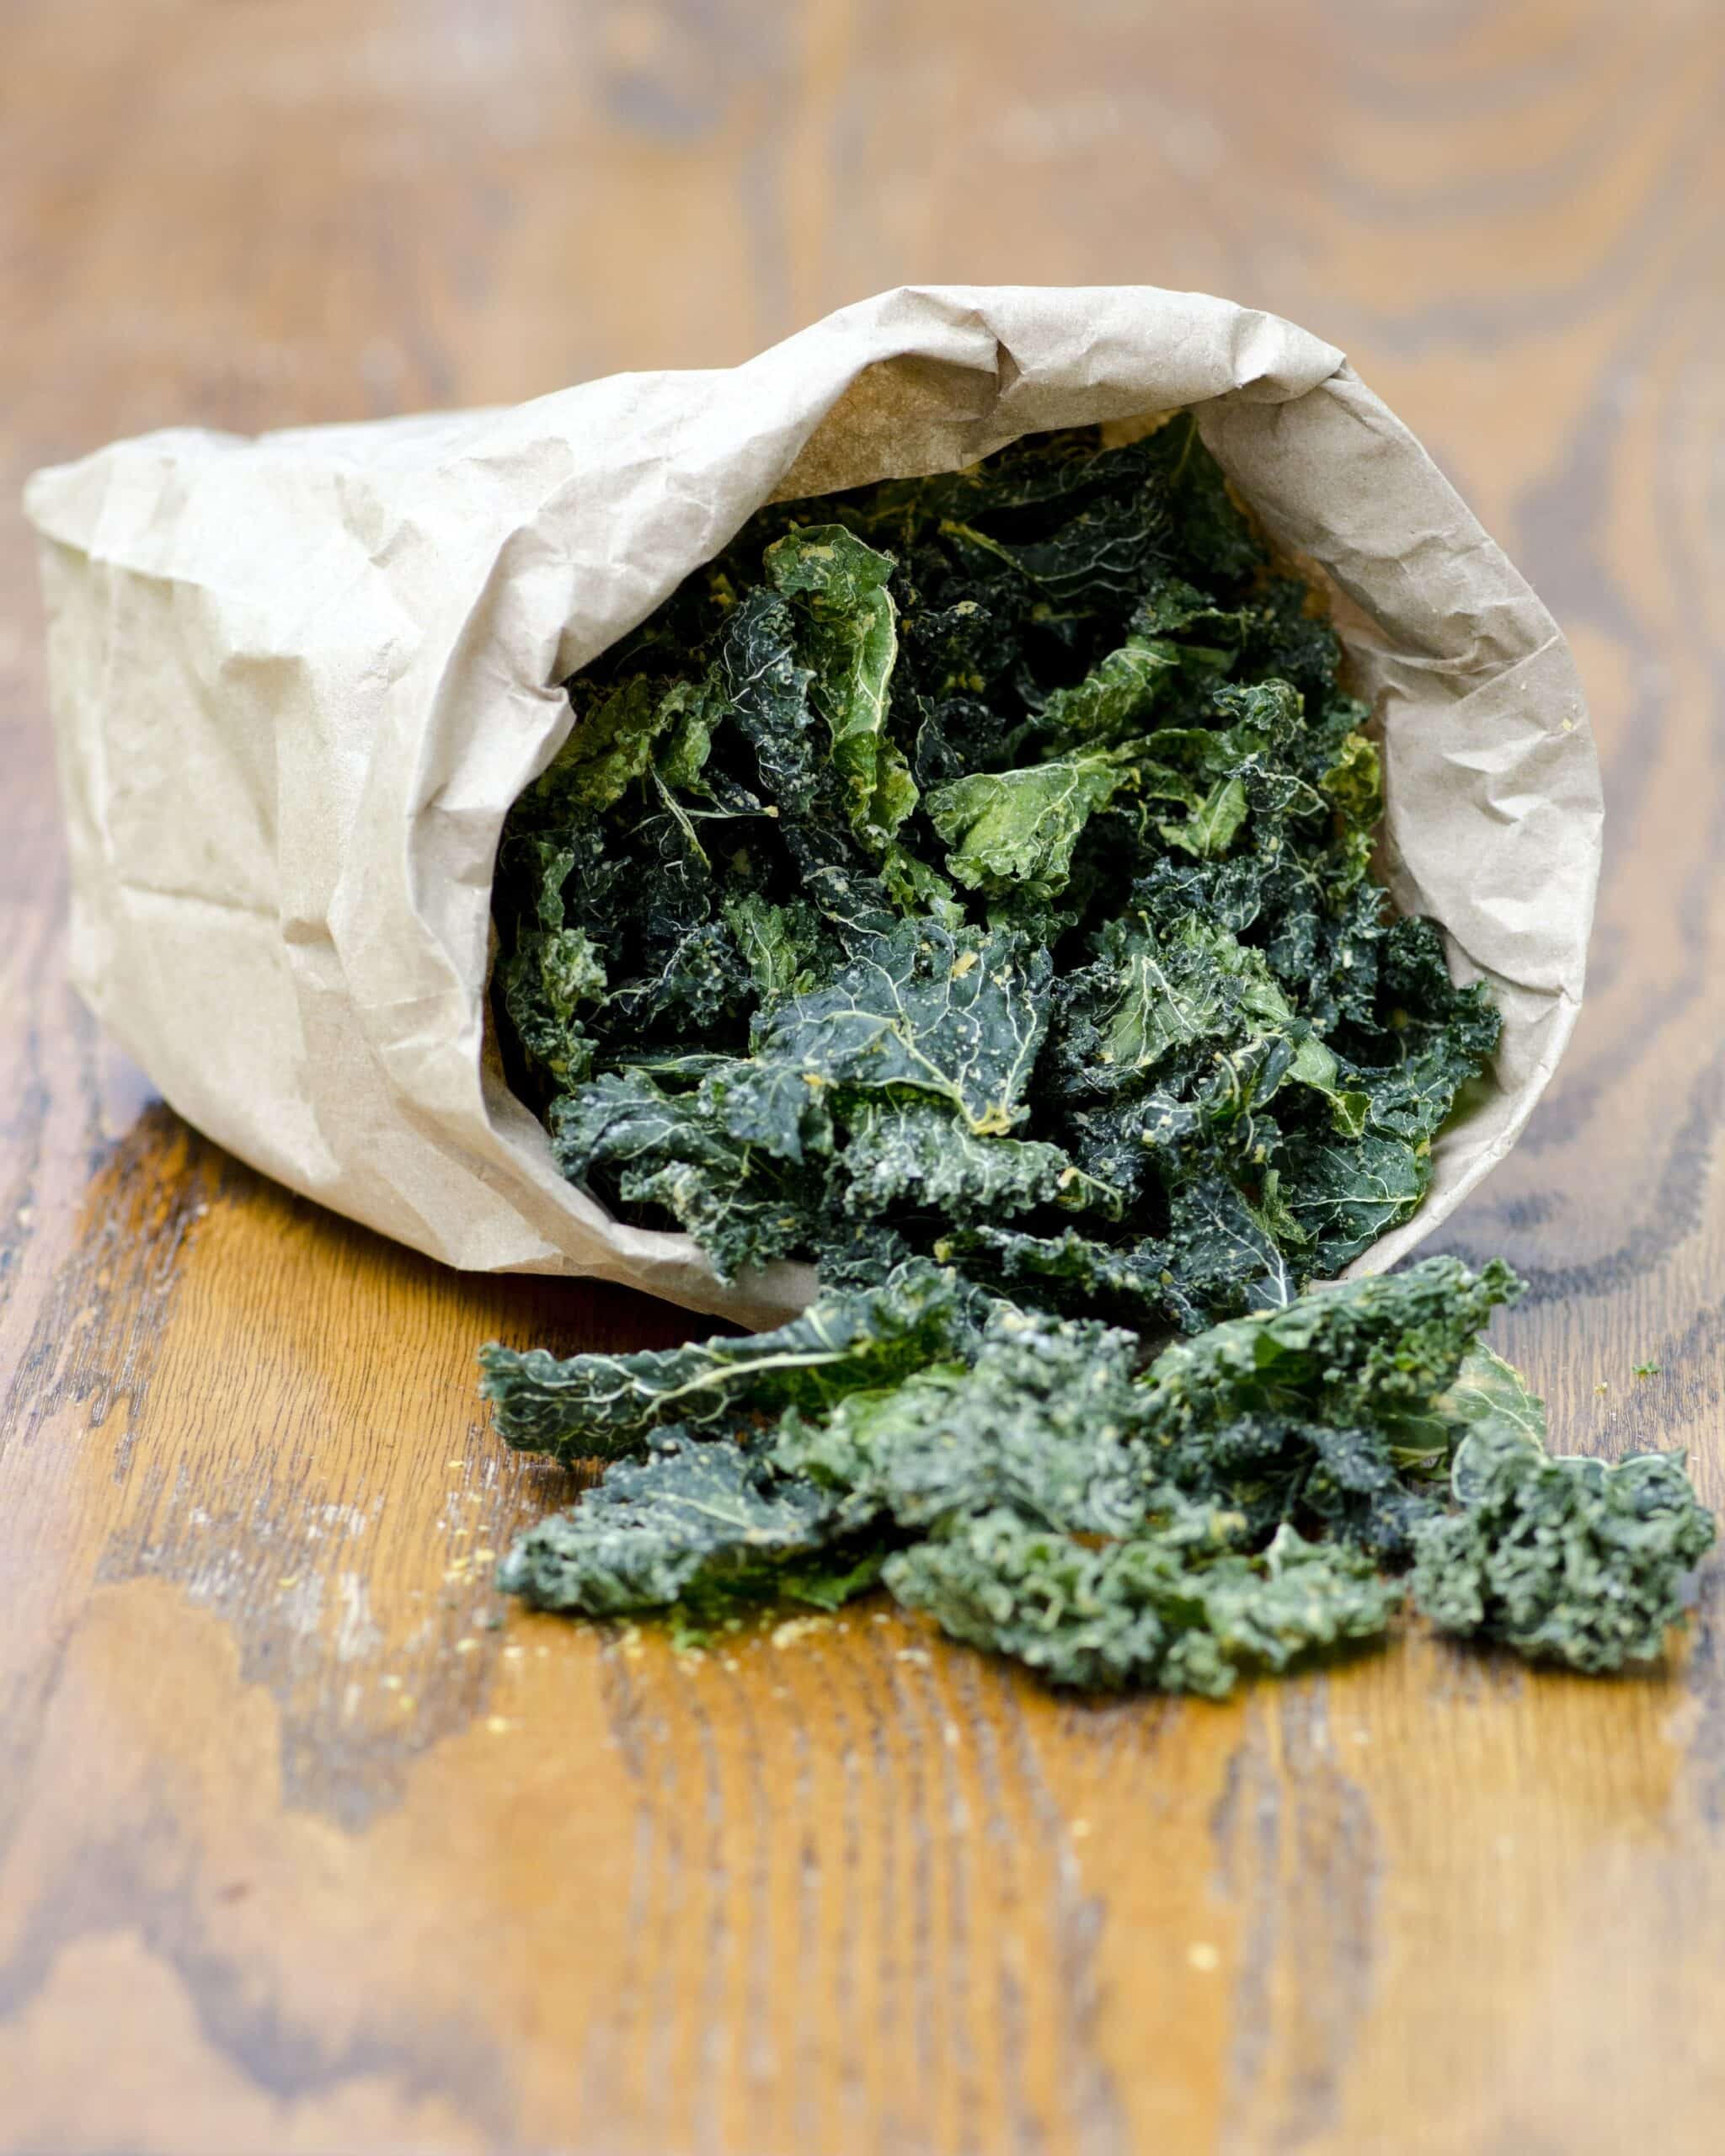
These kale chips are delicious, oil-free, nut-free, and can be made without a dehydrator.
Most kale chips require a dehydrator, and many recipes also include oil.
These kale chips are incredibly tasty and crispy – without needing any oil – AND without needing a dehydrator.

Now, you do have to use a particular method of baking with the oven. Because it’s very easy to burn kale chips in the oven. When they overcook or burn in spots, they lose that gorgeous vibrant green color and taste bitter. The taste is just not the same. It’s not fresh and clean, but rather bitter and sulfurous.
See, most recipes for kale chips in an oven have the setting WAY too high, usually around 400 degrees. But even in recipes that bake chips at a lower oven temp for longer (ex: 300 degrees for 30+ minutes), your kale chips will “cook” rather than “dry”. A dehydrator is so effective because it dries the foods, it doesn’t cook them. That’s why the chips taste so fresh and the greens taste more sweet than bitter.
I don’t have a dehydrator so I started experimenting, to get these crunchy-munchy bites of deliciousness. And this is what I discovered…
The trick is to mimic dehydrating in your oven.
To do that, you need to use the lowest temperature setting possible for your oven, and then alternate turning the oven off and on. For my trials, this took about 1 1/2 – 2 hours. The result? Crispy, irresistable kale chips!
Healthy Kale Chips: Seasonings
Before I jump to the recipe for these healthy kale chips, let’s talk about seasonings. In my experience, kale chips can be too heavily overseasoned, or seasoned with just salt and oil.
This recipe gives you an oil-free ‘dressing’ for the chips that is flavorful but not sickly or hot-spicy. Remember that the kale becomes smaller, and more concentrated with this drying method or with dehydration. So, be somewhat conservative with assertive spices and also with the salt. Try the recipe as-is first, then add your spices to personalize the next time round (see note about seasoning).
And finally, this ‘dressing’ uses some nooch (nutritional yeast). I promise it tastes good. It’s the combination of the ingredients together. Give it a try, even start with a touch less at first to get the idea.
Let me know if you’ve made these, share in the comments. x Dreena

Oven-Dehydrated Kale Chips
Ingredients
- 1 bunch fresh kale curly or dinosaur; about 6–8 loosely packed cups after prepping
- 2 teaspoons tahini
- 2 teaspoons freshly squeezed lemon juice
- 1 teaspoon tamari
- 1/2 teaspoon pure maple syrup
- 2 1/2 – 3 tbps nutritional yeast
- 1/8 teaspoon (scant) sea salt
Instructions
- Wash the kale leaves. Strip the leaves from the stems and place the leaves in a salad spinner. Spin to remove as much water as possible.
- If leaves are still damp, use a kitchen towel to blot dry.
- Turn oven to lowest setting possible (ex: 170F).
- Line 2 baking sheets with parchment paper.
- In a large bowl, combine the tahini, lemon juice, tamari, and maple syrup.
- Stir or whisk through until fully smooth in the bottom of the bowl.
- Add kale leaves and toss through with your hands, gently incorporating the sauce through the leaves.
- Add the nutritional yeast, and continue to work through the kale leaves.
- Transfer the kale leaves to the prepared baking sheets, spreading out.
- Sprinkle the leaves with the sea salt.
- Place the baking sheets in the oven on 2 racks. Bake for an hour.
- Then, turn off oven, rotate trays, and then let sit in the oven for 30 minutes.
- Then, turn oven to 170F again, and bake for another 15–20 minutes.
- Check kale: if completely dry and crispy, remove from oven. If not, turn off heat and let sit for another 30–40 minutes. By then, the kale should be crisp and ready to eat!
Notes
- If your oven can go lower than 170F, the process may take another 20–30 minutes.
- To re-crisp leftovers, reheat at same low temperature until flaky again.
- Do not add extra wet seasonings or it will make the leaves soggy.
- If you want to add other flavors, stick with dry seasonings, and remember the flavor intensifies with drying.
This post was originally published in 2012 and has been updated for 2023.

pamela says
Yum love the recipe. I didn’t have tahini so I used sunflower seed butter that was sweetened it was delicious then just added a dash of maple syrup and a little cayenne too I looove spicy-this was a great recipe thank you and true cooking time too
Des says
I’ve been making them in the oven for a while using the ramping up and then letting it cool a little method. Alton Brown had a tip on using small space heaters in the oven to create the dehydrating effect. I’ve found that on my Whirlpool oven, I can put the top rack all the way up, skip a space and put the next rack in, and fit a Sunbeam mini heater ($24) at the base of the oven. It takes a bit to find out where yours will hit 110 degrees, but by using a probe thermometer or a meat thermometer propped in a cracked oven door, you can find the range fairly easily. The heater has a range of about 20 degrees, so mine would go from about 105-125. The chips took about 7 hours to dehydrate on baking racks over baking sheets. I used curly kale and a fairly wet marinade though. It may only take 5-6 with flat kale and a drier marinade. With the heater in, you will still want to crack the oven door using a wooden spoon handle to provide air flow.
Greg S says
I bought a dehydrator because I didn’t want to buy the chips from Whole Foods that cost $8 when kale costs around or under a dollar a bunch. We bought a lot of kale today and made them for the dehydrator then realized we made too many to fit. So we did them in both the oven and the dehydrator. Both taste that same. I did notice the dehydrated ones have a brighter green to them, much like they do when bought fresh. I have heard that cooking things removes the nutrients, not sure how much though.
We make them for our 2 1/2 year old grandson who eats them like candy, we don’t know if he has a nut alergy so we make them with a little salt and red pepper flakes.
I found a recipe on food.com for spicy Spicy Thai Ginger Chips, wow are those good! They said you can do them in the oven without a dehydrator and cook at the lowest temp, ours is 170 and leave the oven door cracked open.
Both are amazing but I want to know how the back ones differ from the dehydrated ones! As I said the dehydrated ones have more color which to me means they have more nutrients, I could be wrong thought.
All I know is if a 2 1/2 year old loves them and they are good for us, it’s all good.
Oh and we also use raw kale in our smoothies.
Juli-Ann Di Giugno says
Hi I am reading all the comments and I am a couple of months behind but I too have a dehydrate option on my miele oven and I am making the Kale chips as we speak for the first time…..they smell amazing….will keep you posted BTW the temp is 175 -not sure if that is good or bad but we will find out 🙂
Mary says
Hello – I too have a miele oven but don’t know how to dehydrate – any tips or hints please? Have just attempted my first batch as I type -added 100% cashew spread. Thanks. Mary
Rebecca says
Finally making these. The hardest part is waiting for them to be done! (Note to the impatient: they taste great raw, too!)
Rebecca says
Ok, I think I’m one of those strange people who doesn’t love kale chips. BUT I absolutely loved this as a dressing for raw kale. In fact, I’m going to make more right now – and this recipe is going into my DB heavy rotation list of favorites!